Why Make This Recipe
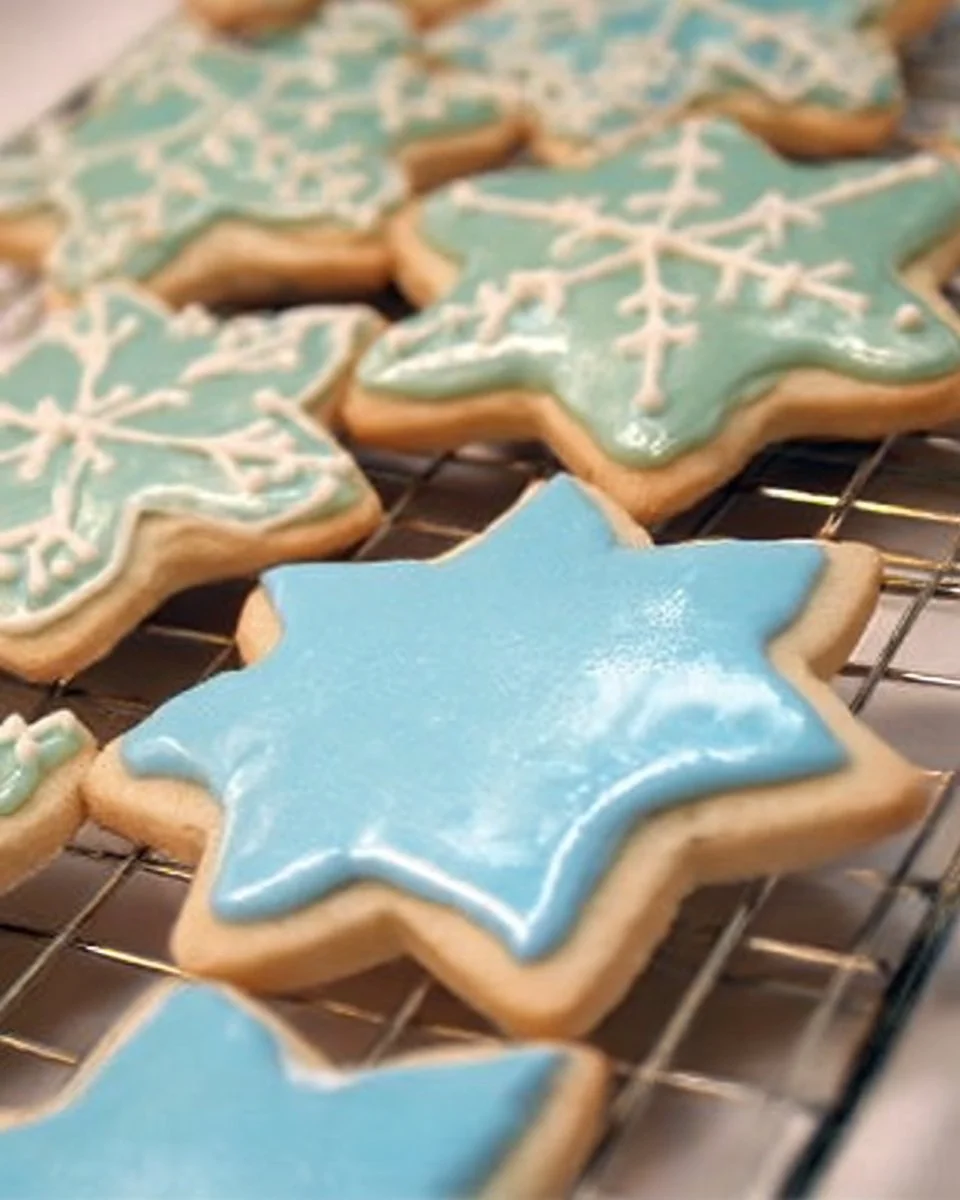
Decorative sugar cookies are a sweet treat that many people enjoy. They’re not just tasty but also fun to make and decorate. This recipe gives you a simple icing that can transform plain cookies into beautiful, eye-catching treats. Whether for holidays, parties, or just a fun family activity, decorating cookies is something everyone can enjoy.
The icing in this recipe is easy to make and dries to a hard finish. This means your designs will look wonderful and can be stacked without ruining the decorations. Plus, adding different food colors can make each cookie unique. When you bring these cookies to share with friends or family, they will surely put a smile on everyone’s face.
Not only does this icing work well for sugar cookies, but it can also be used on gingerbread cookies, holiday cookies, or any baked good that needs a colorful touch. Making this icing is an easy way to add decoration and flavor to your baking projects, making them even more special.
How to Make Decorative Sugar Cookie Icing
Ingredients:
- 3 cups powdered sugar
- 4 tablespoons milk
- 1 1/2 tablespoons light corn syrup
- 1/2 teaspoon vanilla extract (or peppermint, or orange extract)
- Dash of salt
- Optional food coloring
- Plain cooled sugar cookies (for decorating)
Directions:
Gather Your Ingredients: Start by measuring out 3 cups of powdered sugar into a medium-sized mixing bowl. Make sure you have everything ready before you start. This makes the process easier.
Add Milk: Pour in 4 tablespoons of milk into the bowl. Use a whisk or spoon to mix the milk with the powdered sugar. The goal is to achieve a smooth, creamy texture. This step is important for ensuring no lumps of sugar remain.
Add Corn Syrup: Next, incorporate 1 1/2 tablespoons of light corn syrup. This not only adds a nice shine to your icing but also helps it have the right consistency. Mix well to blend it in completely.
Add Extract and Salt: Now, it’s time to flavor your icing. Stir in 1/2 teaspoon of your chosen extract and a dash of salt. The extract will enhance the sweetness and add a lovely taste, while the salt helps balance the overall flavor.
Mix Together: Whisk all the ingredients together until you have a smooth icing. If it seems too thick, add a little more milk to reach your desired consistency. The icing should be thick enough to hold its shape but not so thick that it is hard to spread or pipe.
Color the Icing: If you want to add some color, divide the icing into bowls and add food coloring as desired. Mix each bowl until the color is even. You can make as many colors as you like for different designs.
Transfer to Piping Bags: Carefully move your colored icing into piping bags. If you don’t have piping bags, you could use plastic bags and cut a small hole in the corner. This makes it easy to apply the icing to the cookies.
Decorate the Cookies: Now comes the fun part! Use the piping bags to decorate your cooled sugar cookies. Be creative! You can make lines, dots, or even intricate flowers. It’s all up to your imagination.
Let it Harden: After decorating, allow the cookies to sit at room temperature for about 3 hours. This will help the icing harden so it looks nice and shiny.
Share and Enjoy!: Once the icing is set, present your cookies beautifully. Gather your friends or family and enjoy these delightful treats together!
How to Serve Decorative Sugar Cookies
Serving decorative sugar cookies can be just as fun as making them. Here are some ideas:
On a Plate: Lay the cookies on a nice serving plate. You can arrange them in a circle or stack them in a tower for a more attractive display.
In a Box: Place decorated cookies in a decorative box with a clear lid. This not only looks pretty but also keeps cookies fresh.
As Gifts: These cookies make wonderful gifts! You can wrap cookies in cellophane with a ribbon or pack them in a gift basket.
With Milk: Serve your cookies with a cold glass of milk or hot cocoa. This combination is always a hit, especially with kids.
At Parties: Include these cookies as part of a dessert table at parties. Add in some fruits and other treats to make a colorful spread.
How to Store Decorative Sugar Cookies
Storing your decorative sugar cookies properly is important to keep them fresh. Here are some tips:
Cool Completely: Make sure the cookies are completely cool and the icing is hard before storing. This helps prevent smudging.
Use an Airtight Container: Store cookies in an airtight container at room temperature. This keeps them fresh for several days.
Separate Layers: If you are stacking cookies, place parchment paper between layers to avoid sticking or damaging the icing.
Avoid Heat and Humidity: Store the cookies in a cool, dry place. Heat and humidity can cause the icing to melt or become sticky.
Freezing: If you want to keep cookies for longer, you can freeze them. Place them in a single layer on a baking sheet until frozen solid, then transfer them to a freezer-safe container. Thaw at room temperature when ready to eat.
Tips to Make Decorative Sugar Cookie Icing
Here are some helpful tips to get the best results when making your icing and decorating cookies:
Use Fresh Ingredients: Make sure your powdered sugar and extracts are fresh for the best flavor and consistency.
Adjust Consistency: If your icing is too thick, add a tiny bit more milk. If it’s too runny, add a little more powdered sugar to thicken it.
Test the Icing: Before decorating all cookies, test the icing on one cookie to see if the consistency is just right.
Work Quickly: Once you start decorating, try to work quickly. If the icing sits too long, it may dry out in the piping bag.
Use a Toothpick: For detailed decorating, use a toothpick to spread icing and create fine designs.
Variation
If you want to try something different with the icing, here are a few variations:
Flavor Alternatives: You can use different extracts like almond or lemon for a unique taste.
Add Sprinkles: Before the icing dries, add colored sprinkles to enhance the look of your cookies.
Marbling Effect: To create a marbled effect with colors, drizzle different colors on the cookie and gently swirl them together with a stick or toothpick.
Royal Icing Addition: For a stiffer icing, consider making royal icing, which is great for detailed designs and can be shaped into decorations.
FAQs
1. Can I use this icing for cookies other than sugar cookies?
Yes! This icing is versatile and can be used for various types of cookies, including gingerbread cookies, butter cookies, and more.
2. How long does this icing take to dry?
The icing typically takes about 3 hours to harden completely at room temperature. However, this may vary based on humidity.
3. Can I make the icing ahead of time?
Yes, you can make the icing ahead of time and store it in an airtight container. Make sure to stir it well before using, as it may thicken in storage.
4. What should I do if my icing is too runny?
If your icing is too runny, slowly add more powdered sugar until you reach the desired consistency. Mixing thoroughly ensures it’s smooth.
5. How should I store leftover icing?
If you have leftover icing, store it in an airtight container in the fridge. Stir before using it again, and you might need to add a bit of liquid if it thickens too much.
With these tips and steps, you can create beautiful decorated sugar cookies that everyone will love. Enjoy your baking adventure!
Print
Decorative Sugar Cookie Icing
- Total Time: 15 minutes
- Yield: 20 cookies 1x
- Diet: Vegetarian
Description
A simple and versatile icing recipe perfect for decorating sugar cookies, gingerbread, and more. This icing dries hard for beautiful designs.
Ingredients
- 3 cups powdered sugar
- 4 tablespoons milk
- 1 1/2 tablespoons light corn syrup
- 1/2 teaspoon vanilla extract (or peppermint, or orange extract)
- Dash of salt
- Optional food coloring
- Plain cooled sugar cookies (for decorating)
Instructions
- Gather your ingredients: Measure out the powdered sugar into a mixing bowl.
- Add milk: Pour in the milk and mix until smooth.
- Add corn syrup: Incorporate light corn syrup for shine and consistency.
- Add extract and salt: Stir in your chosen extract and a dash of salt.
- Mix together: Whisk until smooth, adjusting with more milk if needed.
- Color the icing: Divide and add food coloring as desired.
- Transfer to piping bags: Move the icing into piping bags for easy application.
- Decorate the cookies: Use the piping bags to create designs on the cookies.
- Let it harden: Allow cookies to sit for about 3 hours to set.
- Share and enjoy: Present your beautiful cookies and enjoy with friends or family!
Notes
Use fresh ingredients for the best flavor. Adjust icing consistency as needed with milk or powdered sugar.
- Prep Time: 15 minutes
- Cook Time: 0 minutes
- Category: Dessert
- Method: Mixing
- Cuisine: American
Nutrition
- Serving Size: 1 cookie
- Calories: 120
- Sugar: 20g
- Sodium: 50mg
- Fat: 0g
- Saturated Fat: 0g
- Unsaturated Fat: 0g
- Trans Fat: 0g
- Carbohydrates: 30g
- Fiber: 0g
- Protein: 0g
- Cholesterol: 0mg
Keywords: sugar cookies, icing, decoration, baking, dessert